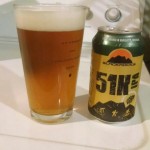
Strong pilsner aroma. Starts smooth them comes in with a sharp bite at the back end. Aftertaste you can taste the spruce flavor. A bit minty. In hindsight, I’m not sure I want my beer to taste like a pine tree…
2.5 out of 5 Stars.


Strong pilsner aroma. Starts smooth them comes in with a sharp bite at the back end. Aftertaste you can taste the spruce flavor. A bit minty. In hindsight, I’m not sure I want my beer to taste like a pine tree…
2.5 out of 5 Stars.
Very sweet hop aroma, almost like pineapple juice. Clean, sweet bite. Full-flavored, but not overpowering. Slight hop flavor lingers and fades out with some sweetness. A lot of floaters in there. Only 2.5 months old, and bought from the cooler, so should be ok.
5 out of 5 Stars.

Clean hoppy aroma. Crisp flavor bite that comes in with a nice malt taste. Followed by hints of the rye sweetness but matched with a hop bite that keeps it from being too sweet. Fairly clean finish. Full flavored, but doesn’t come across as 8%, so it could be deceptive.
4.5 out of 5 Stars.

Strong sharp aroma of hops. Clean hop taste that gets slightly bitter them blends smoothly into a nice slightly sweet malt taste. Very smooth, with nice lingering hop flavors.
4 out of 5 Stars.

Strong sweet aroma. Sharp mix of hop sweetness and malt sweetness. Finishes with a clinging malt flavor that’s both sweet and clean.
3.5 out of 5 Stars.

My first attempt at a yeast starter was a failure. I didn’t know why at the time, but it was obvious the flat, non-bubbling mixture wasn’t any kind of “starter”- it was completely dead. I made it in an empty, cleaned 2L pop bottle so I could see through the bottle pretty easily. I followed the directions for size, amount of malt extract, etc. I was even frequently shaking it up in order to aerate.
The problem was I was suffocating it. I kept the lid closed tightly, thinking it needed to act as my sort of airlock barrier to keep all the gremlins out that they make you fear as they drill into your head about sanitizing while homebrewing.
However, by keeping the lid on tight, there were 2 problems. First was any CO2 created by the fermentation had nowhere to go. So it would just build up gas inside the bottle and build pressure. Eventually this would stifle out the fermentation reaction.
The second problem was I wasn’t introducing any new oxygen to the hungry yeast process. As I later learned, in the case of the yeast starter, an airlock doesn’t work. It solves problem #1 (pressurization and CO2 build-up), but doesn’t allow any extra oxygen supply to help keep the yeast propagation going.
So I learned the following routine with the lid was the best approach: 1) Keep the lid loose while the bottle/jug is sitting in a warm spot and fermenting, 2) Tighten the lid only when shaking it to aerate the wort (with the oxygen you’ve let in with the loose lid while it was sitting on a shelf. After following this process, I’ve had good luck with my starters fermenting and multiplying yeast.
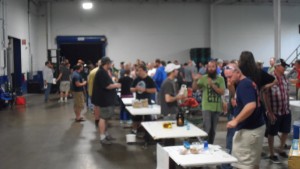 There are 2 kinds of homebrew competitions- one that has judges rate beers against the specific style guidelines, and the other where it’s a people’s choice, or popularity vote. I entered one that was judged by a group of other homebrewers. Standing by my table serving my Blonde Ale, I overheard a lot of comments by people holding their voting cards. I witnessed a lot of people looking at my little sign saying “Blonde Ale” and walking on by without tasting it. But the guy next to me with the Belgian Sour blah-blah-blah or the Dunkelweiss Dark Peanut Butter Coconut Ale, saw a lot more tasters.
Don’t get me wrong and think that I didn’t have fun talking to the brewers and figuring out how they made a great peanut taste in their beer without it being overpowering. But I definitely noticed that the stranger the ingredients or crazier the style, the more people that were lined up to give it a try.
I would humbly suggest that my beer was very good. Maybe one of the best I’ve brewed, surprisingly. I was limited by the ingredients available, but I lucked out and made something really good. But it wasn’t weird or strange. It didn’t include any unexpected ingredients like peanut butter, black licorice, or gummy bears. So as homebrew judgers walked along figuring out which ones they were going to taste, the plain sounding and ordinary got passed over.
Obviously no one could tell what my beer tasted like from the name. But they could tell it wasn’t anything wild, exotic, or unknown. So what I took away from the experience was that if I was going to win the people’s choice, I needed to have a description that lured people in. And to lure people in, I needed something strange and wild. So the takeaway I had was next time I brewed a Blonde Ale, I should throw some Jalapenos or Sour Patch kids into the mix and that might get people to wander up and give it a try. Some advice for you if you’re entering a hombrew competition.
When you brew outside, there are a number of factors that are entirely dependent on the weather. An important one is your rest temperature. Your recipe/process may call for a rest at a given temperature for 15, 30 minutes, or even as long as an hour. While brewing outside, the ability to hold that temperature is dependent on your weather that day. Brewing in the summer on an 80 degree day, it might be a lot easier to hold 145-degree temperature than when brewing on a 30-degree day.
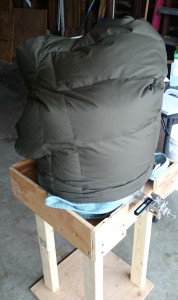
The ability to hold temperature is largely dependent on the amount of grains being soaked (the more the grain, the more resistant the mash is to the weather outside). 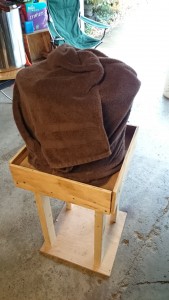 The simplest way to stay in control is to wrap your mash tun in layers to keep the heat transfer down. In the summer you may be fine simply turning off the propane heat and waiting the whole mash period, but come fall you probably need a wrap (towels work well), and come winter you definitely need a wrap. An easy solution to this warmth is to get a good winter coat that’s big enough to fit around your mash tun and then throw that over it when you reach your rest temperatures. It’s certainly a lot easier than turning on and off the heat on your burner to try to maintain a fixed temperature!
Sweet hops smell with hints of fresh yeast. Crisp hop bite, with good mix of hops and malt. Dry, not to sweet or too much aftertaste. Maybe a hint of yeast flavor in mild aftertaste.
4 out of 5 Stars.
My first starter homebrew kit came with the standard 3-piece airlock. It always served me well, was easy to use, so I had no reason to question it. But I made a couple of batches that made me realize the blow-off tube method of managing off-gassing has its place as well.
The first instance was a batch I made at a Big Brew Day event at a local brewery (Rochester Mills). As part of the event, they provided everyone with yeast slurry from the production facility. I provided a clean & sanitized growler and they filled it with yeast. After I made my beer and transferred it into the fermenting bucket, I went and retrieved my growler of yeast. It was almost completely full with thick yeast sludge/foam. I dumped the whole thing in there, and had no doubts of this beer’s ability to convert. It was truckloads more yeast than I’ve ever pitched before.
After fermenting for a day in the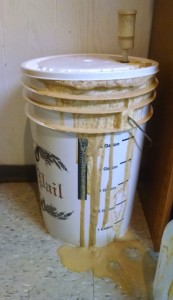 basement, I went down the next day to see a blowout disaster. The airlock had backed up and filled with yeast/krausen, the pressure built up, and eventually popped the lid off my fermenting bucket and puked mess out around on the bucket and floor.
Thinking I had passed the worst of it, I cleaned things off, cleaned out the airlock and put it back on. Checking again a few hours later, I saw foam starting to creep into the airlock again. At that point I knew I couldn’t contain it, so I improvised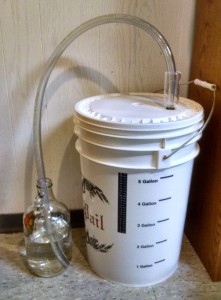 and shoved a length of extra hose onto the body of the airlock and ran the hose down into a growler filled with water to keep the hose from being exposed to air. Soon I had giant glugs of air going out through the water. With the size of the hose, I didn’t have any risk of plugging up with foam.
The other instance I found the blow-off tube helpful at avoiding the blowout was a beer where I had my fermenting bucket really full. I was going to be doing a large amount of dry hops, and to counteract the lost volume from all the debris I’d get, I put 5.5 – 6 gallons of wort into my fermenting bucket. Once it started fermenting, I soon saw foam creeping down the tube. It made it all the way to the water jug, but still due to the size of the tube, never plugged and never had the over-pressurization issue. I’m sure if I had an airlock on there I would’ve plugged it and popped the top.
So the airlock has advantages of being simple. But if you’re going to have a really active fermentation, or a large volume in your fermenting bucket, you probably should do the blow-off tube.