
I always brew outside, as I think most people do. Or at least people brewing all-grain, since you need a serious heat source to boil that much water and indoor stovetops don’t cut it. But that’s OK, because brewing outside is great, as you get to enjoy the out of doors. Different weather seasons bring different brewing challenges, and the heat of the summer is no different.
The main challenge I encountered was getting my wort to cool down. Oh the first 100 degrees was not an issue, but trying to get down to 65F or so when it’s 85F out was a challenge. I’d be running the hose through the wort chiller and as I kept checking the temperature, I was disappointed at how slowly it was dropping the final degrees I needed. It made me even contemplate backtracking to the days before my wort chiller and filling a sink up with ice water to put the pot into.
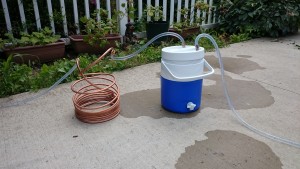
Then I read about making a pre-chiller for your wort chiller. Basically you hook another chiller up and connect it to your wort chiller. You plumb it into a cooler, which you then fill with ice water. Then your garden hose water goes through the pre-chiller, which drops its temperature a few degrees before heading into your wort chiller.
I made mine pretty simply. I had a sm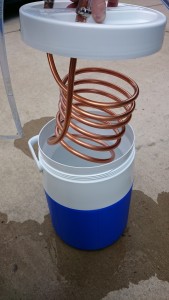 all drink cooler, bought a small coil of soft copper tubing, length of hose and a couple screw clamps. I wound the copper tubing around a bottle and made sure the inlet was hooked up to the end that would coil around and loop through the ice water before connecting to the outlet. Small drilling in the lid and I was all set to go.