
April 6th, 2013, Homebrew
I’ve made around 10 batches of homebrew over a couple of years’ time. It’s been difficult to stay motivated. The process in general is great. It’s fun smelling that raw grainy fresh aroma of your grains brewing, and feeling you’re a part of something really unique. Measuring things out, stirring them in, seeing it change colors, change
aromas, watching the clock trying to be precise and sure of what you’re doing- it’s all very exciting. My first couple of batches weren’t anything special, but they weren’t bad.
But after a couple, I grew impatient. I had a beer tasting palate that enjoyed exploring and trying new and different delicious-tasting creations. So to spend the time thinking I was creating something
great, and ending up with something that was fairly boring, got old fast. I foolishly thought I could use my familiarity with tasting tons of different beer and that would directly translate into being able to come up with a great beer recipe. Luckily, it took me only one recipe creation to find those 2 things aren’t necessarily related. I then moved on to clone recipes, trying one of my favorite craft IPAs- Bells Two Hearted Ale. That turned out to be delicious. It tasted even better than Two Hearted to me. After that success, I ran into something in my process that was giving me a distinct and noticeable “homebrew” flavor to it. It wasn’t horrible or anything, but very distinct across several different recipes. So to me, it felt like I was tasting the representation of the words “amateur” whenever I drank it, which of course was disappointing.

I then told myself that it wasn’t worth it. I loved the brewing process, but to end up with 2 cases of a beer that I didn’t enjoy, when every time I went to the grocery store I found 2-3 six packs of some new craft beer I wanted to try, didn’t make sense. I could buy better quality beer, and only commit to a 6-pack at a time. I told myself I would only brew if I could make something I couldn’t find on the market. Specifically a low alcohol IPA, or if I could put something on draft. Before I got around to brewing a low-alcohol IPA, the craft brewers had come to the same conclusion and there were a few good ones on the market. That put off my homebrewing again. But when I bought a kegerator, along with the equipment to keg my own homebrew, I was ready to take the homebrew challenge again. So here’s an overview of homebrew process for anyone that wanted to get an idea of what it’s like. Long intro, huh?
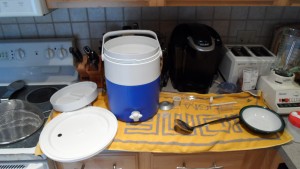
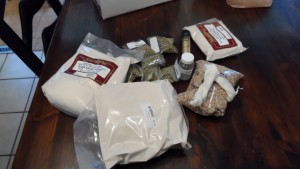
First step is to clean & sterilize all your equipment. This isn’t the exciting part of homebrewing, but it keeps unknowns from getting into the mix and ending up with strange flavors you may regret. Luckily it doesn’t take a lot of time. I guess technically the first step is figuring out the recipe of what you’ll make and then buying the ingredients. Detroit has a few good supply stores that make this pretty simple. There’s fancier/more complicated all-grain brewing, which I don’t do. And there’s super-basic all extract or kit brewing that’s kind of like “open can, mix with water, bottle it”. I do the in-between process called partial mash. It has some parts of working with raw grains, which adds to the coolness factor, but doesn’t involve a lot of equipment or a lot of extra time. So the supplies consist of the malt that’s either in liquid/syrup-y form, or a dried powder form, some raw grains, the hops ground up and formed into pellets, and the yeast.
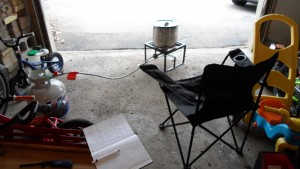
The next major step is getting your water up to the right temperature for the first grain-soaking. This isn’t complicated, but it takes a while. When I first started, I used my electric stove top to heat the 2-2.5 gallons of water, which took forever. Through some well-spent birthday cash spending, I bought a small burner set-up that hooks up to a BBQ propane tank. You have to upgrade to doing the brewing outdoors, but that’s actually a perk. You get to be outside, sitting in a lawn chair, lazily checking the thermometer on you pot full of water, waiting for it to get to the right temperature for your grain soaking. This is the perfect time to completely relax and have some “me time”- which goes completely undervalued when your single and/or before you have kids. This also is about the right amount of time to enjoy one or two beers. This is the easiest part of the brewing process.
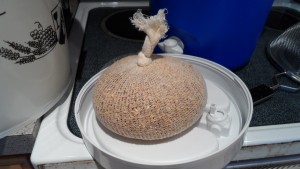
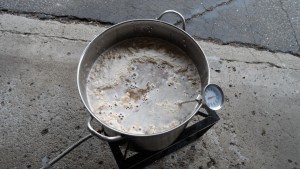
After that you have to soak the grains in the water at a warm, but not boiling temperature. Here’s where the stopwatch first comes into the process. You soak for about 20 minutes, so although you still have some time to sit & relax, you have to keep an eye on the clock, and start getting things ready for your next step, so it’s not as relaxing as the “watching the water heat up” stage. You then dump the grain, and then take that grainy water, add it to some regular water, and your malt extract and then go back to the sit & wait position. This part doesn’t involve watching a stop watch, but it does involve avoiding the terrible occurrence of your malt boiling over. So it can be stressful. If you’re not closely monitoring it, it will quickly boil & bubble up and you’ll
end up spewing some of your malted grain over the edge of your pot. So you have to keep a close eye on it, ready to stir with your giant spoon, and ready to throttle back the temperature at a moment’s notice.
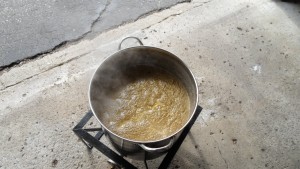
Once you get it to boil, you start your timed 60-minute boil period. This is where the hops are added at different points to make up the bitterness of your beer. The longer the hop boils, the more acid or something it lets go, and different hop flavor it creates. So there are multiple combinations of types of hop added at different points during that 60 minute boil, or all the same hop, just added at different times for different flavors to be extracted. Although this part is more active, it’s one of the great enjoyable creative moments in the process. You see and smell all this great green hoppiness coming up off your steaming cauldron. I probably absorb a bottle of water through my face pores leaning over and letting that delicious steam waft up and envelop my olfactory senses.
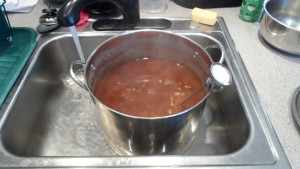
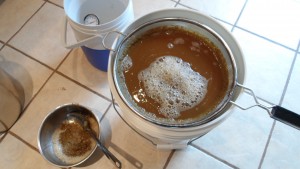
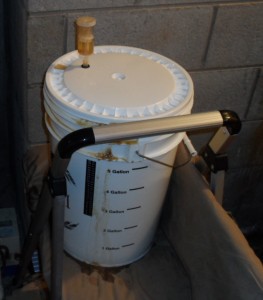
After your 60 minutes are up, the fun creativity ends. You then spend time getting the temperature down cool enough for your yeast. Too hot and you kill of the yeast and your beer doesn’t ferment right. Too cool and you end up sitting and waiting a longer time for fermentation to start and wondering if you messed it all up somewhere along the way. Once it’s cool enough, you stir in your yeast, mix it up really good and then put it in a sealed bucket to ferment for about a week. After that, you siphon it off (to leave all the nasty sludge in the bottom of the bucket) and put it into a glass carboy- maybe adding some hops again for “dry hopping”. That sits for another week and you’re ready to bottle or keg it. Since I had my kegerator system this time, I simply dumped it in there and let it sit for about a week before I hooked it up to CO2 and then started enjoying it.

I decided for this first kegging operation, I should go with a recipe that was successful before, so I did the Two Hearted. It came out quite nice. Not as awesome as my one-time miracle of a couple years ago in the bottle, but still good. I didn’t have the telltale “homebrew flavor” that turned me off from brewing previously, so that was good. It had a fresh, raw taste to it, that made it unique and something I couldn’t buy at the store. So all in all, mission accomplished. The brewing day takes up the biggest chunk of time, and for me, I find I need about 6-8 hours to do the sterilizing, brewing, dumping into the brew bucket, and then cleaning up. Not a huge amount of time, but if you can’t devote that amount of time to the task- uninterrupted- it will turn into a stressful event with perhaps bad taste results. It’s not a hobby for everybody, but if you are a bit interested, I’m sure you’ll find it enjoyable- even if you only do it once.